Folks ask me why I carry a monocular instead of “just getting binoculars like everyone else.” I get it. Birding gear can feel like a rabbit hole, and if your hands aren’t as steady as they used to be, the last thing you want is something that makes you fuss more, not less.
Here’s the honest answer: a monocular for birding can be the difference between actually seeing the field marks and giving up after a few shaky seconds. It’s not magic, and it won’t replace a good pair of binoculars for every situation. But when you want steady viewing with one hand—especially if you’re juggling a phone, a railing, a walking stick, or you’re just trying to keep your shoulders from tightening up—it’s a practical tool that earns its spot in the pocket.
I’m 68 now, and on days when my grip is a little cranky, the simple gear is the gear I use.
Why a monocular works so well when one hand needs to do the job
Binoculars ask a lot from your body: both hands, both arms up, shoulders engaged, and your eyes aligned just right. A monocular is lighter, simpler, and easier to “lock in” against your face. You can brace it with your thumb and knuckles and let your cheekbone do some of the stabilizing work.
That matters when your knees don’t love long standing sessions and you’re shifting your weight every minute or two. It also matters when you’re at a window watching a Northern Cardinal hop the feeder, and you’d like to hold the optic with one hand while the other hand keeps you steady against the sill.
A couple practical reasons it feels steadier:
-
One barrel means fewer alignment issues. You’re not trying to match two images.
-
It’s easier to brace. A monocular naturally tucks into your palm.
-
Less weight out front. Less wobble from tired wrists.
-
Quick in, quick out. You spend more time looking at birds, less time re-adjusting.
My one-hand steadying method (the “three-point brace”)
If you want steady viewing with one hand, this little routine beats raw grip strength every time. Think of it as creating three contact points so the monocular isn’t floating in midair.
-
Hand: Wrap your hand around the monocular with your index finger ready for the focus wheel.
-
Face: Press the eyecup lightly into your eyebrow/cheek area. Not hard—just enough to create contact.
-
Anchor: Use something solid for your elbow or forearm—window frame, fence post, the top rail of a deck, even the edge of your garage door opening.
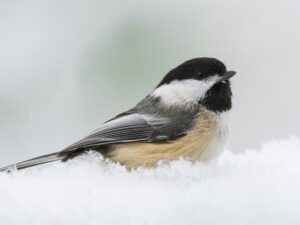
When I do this, I can hold a view on a Black-capped Chickadee long enough to catch that little bib and the quick head movement instead of getting a blur and a headache.
Quick checklist for the brace:
-
Elbow supported whenever possible
-
Focus with small, slow turns—don’t crank it
-
Exhale gently as you settle the view
Choosing the right monocular for birding without overthinking it
You can spend a lot, or you can spend smart. Most folks do best by picking a monocular that matches how they actually watch birds—backyard, park, travel, or the occasional hawk scan.
Here are the features I’d prioritize, in plain language:
-
Magnification: 8x is forgiving. 10x shows more detail but shakes more.
-
Objective size: Something in the 25–36mm range balances brightness and weight.
-
Focus style: A smooth focus wheel you can turn with one finger matters more than fancy marketing.
-
Eye relief: If you wear glasses, you’ll want decent eye relief and a usable eyecup.
-
Close focus: Helpful for feeders and butterflies, not just distant birds.
-
Grip: Rubber armor and a shape that fills your hand reduce hand fatigue.
Typical price ranges (in USD) that make sense:
-
$40–$90: workable for casual feeder watching
-
$100–$200: the sweet spot for clarity and durability
-
$250–$450: nicer glass, better coatings, better low-light performance
I’ve tried bargain optics that looked fine indoors and then turned into a hazy mess outside. Clarity and a smooth focus are what keep you using the thing.
Monocular vs binoculars vs a small spotting scope (a practical comparison)
This is where people get stuck, so let’s make it simple.
Monocular
-
Best for: quick looks, one-handed use, walking, casual backyard birding
-
Trade-off: narrower view, less “immersive” than binoculars
Binoculars
-
Best for: longer sessions, scanning flocks, more comfortable two-eye viewing
-
Trade-off: heavier, needs both hands, more fiddly if your shoulders tire
Small spotting scope
-
Best for: shorebirds, hawks, long-distance detail
-
Trade-off: tripod needed, slower setup, not pocket-friendly
If you mainly watch birds at 10–60 feet—think Blue Jays, American Goldfinches, Mourning Doves—a monocular is plenty for identifying and enjoying. If you spend a lot of time scanning big areas, binoculars still shine. If you’re trying to read leg bands on a far duck, that’s scope territory.
The “wrong try” I see a lot (and how to avoid it)
A common misstep is buying the highest magnification you can afford because it sounds better on the box. Then you raise it to your eye and it’s like trying to read street signs from a moving bus.
For most folks, 10x is where shake becomes noticeable, especially one-handed. If your hands are steady and you’re anchoring your elbow, 10x can be great. If you know your grip isn’t what it used to be, 8x often delivers a clearer, more usable image because you can actually hold it still.
Another wrong try: skipping the strap or lanyard. You drop one optic in the driveway once and suddenly your “great deal” isn’t such a deal.
One more thing—I’ll admit I’ve changed my mind on this: I used to think pocket size mattered most, then I realized slightly larger models are easier to hold steady.
Troubleshooting: 5 common problems and easy fixes
Here are the issues I hear about the most, with fixes you can try immediately.
-
“The image shakes too much.”
Fix: Use the three-point brace, drop to 8x if you’re shopping, and support your elbow on something solid. -
“I can’t find the bird fast enough.”
Fix: Keep both eyes open as you bring the monocular up. Start by lining up with your non-viewing eye, then settle in. -
“Focus feels touchy and I overshoot.”
Fix: Turn the focus wheel slowly with just the tip of your finger. Pre-focus at feeder distance (like 15–25 feet) before you start. -
“It’s not bright enough near the end of the day.”
Fix: Choose a slightly larger objective (like 32–36mm) and avoid tiny 16–20mm models if brightness matters to you. -
“My hand cramps after a minute.”
Fix: Add a wrist strap, rest between looks, and pick a monocular with a thicker body or grippy armor so you’re not pinching it.
Comfort upgrades that make a bigger difference than fancy specs
If you’re trying to make birding easier on your body, comfort wins. A couple small add-ons can make the whole experience feel calmer.
-
Wrist strap or lanyard: Keeps you relaxed because you’re not afraid of dropping it.
-
Eyecup that fits your face: A good eyecup helps stabilize and blocks stray light.
-
Light gloves with grip dots (in cool temps): Helps if your grip slips.
-
A “home base” viewing spot: A chair by a window with a sill you can rest on beats standing around.
And yes, backyard reality counts. Squirrels will test every feeder setup you’ve got, and raccoons will absolutely treat your yard like an all-night buffet if you leave food out. A monocular helps you enjoy the birds even when you’re also monitoring the chaos at the feeder line.
A simple backyard routine that actually gets used
If you want to make the most of a monocular without turning birding into homework, try this routine. It’s short, repeatable, and friendly to tired legs.
-
Set the scene: Stand or sit where you can rest your elbow—window frame, fence post, deck rail.
-
Pre-focus: Aim at the feeder pole or a branch about 20 feet away and get it sharp.
-
Scan with naked eyes first: Find movement—don’t hunt through the optic.
-
Lift and brace: Three-point brace, then micro-focus.
-
Confirm details: Look for two or three field marks—color patch, bill shape, behavior.
-
Take breaks: A 20-second look is better than a strained 2-minute stare.
That’s how you catch the quick stuff: a White-breasted Nuthatch creeping down the trunk, or a Downy Woodpecker showing that small bill and tidy check pattern.
Money and time trade-offs: what you’re really paying for
People ask what makes one monocular cost $60 and another $300. Here’s the practical version:
-
Better coatings improve brightness and contrast—useful for shady yards and dark birds.
-
Sharper edges help when you’re scanning a flock and don’t want only the center crisp.
-
Smoother focus matters when birds hop fast and you’re re-focusing constantly.
-
Durability and sealing matter if you toss it in a coat pocket or keep it in the car.
If you bird a couple times a week, spending $120–$200 often saves you time and frustration. If you only use it occasionally, a lower-cost model can still do the job—just prioritize comfort and focus feel.
Steady doesn’t have to mean complicated
If your goal is to enjoy birds more and wrestle with gear less, a monocular is a friendly option. It’s small enough to live by the door, easy enough to bring along, and simple enough that you’ll actually use it. The best part is how it supports that one-handed steadiness—one hand on the optic, the other doing whatever real life needs: holding a rail, carrying something, keeping your balance, or managing a phone.
Start with the brace technique and a realistic magnification. Pay attention to how your hand feels after a minute, not how impressive the numbers sound. If your knees need more sitting than standing, set up a comfortable viewing spot where you can rest your elbow and take your time. Birding isn’t a test. It’s a small daily win—seeing the goldfinch flash by, noticing the nuthatch’s pattern, catching the cardinal’s crest in crisp detail.
When the view stays steady, the whole hobby feels steadier too.